How Can I Add Tabs Programmatically To UITabBar?
Usually when you want UITabBar in your app you can simply add a UITabBarController to your MainWindow.xib. In fact, XCode already comes with a pretty good template that sets up an app with UITabBar for you right out of the box. This is great, but sometimes you want to be able to have your app dynamically add tabs and the view controllers that go with them. The only way to do that is to dig into some code.
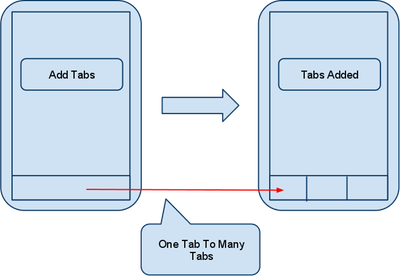
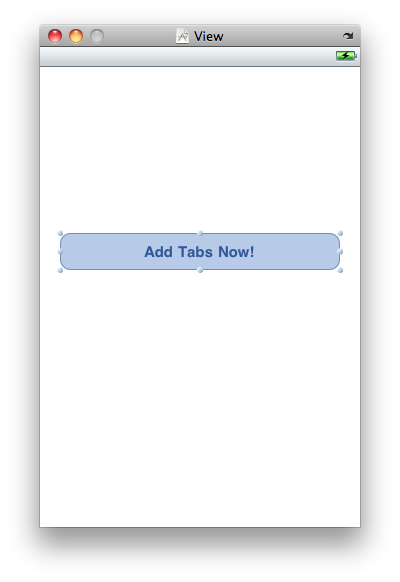
To demonstrate how to add tabs to your app in code I am going to use the Tab Bar Application template in XCode to create a simple tab bar based app. My app will only start with one screen (and corresponding tab) with a button on it. When you touch the button the app will magically add a four new tabs and screens to the app. It will look something like this:
The first thing that you need to do is to create a new iOS app. Open up XCode and choose “File” > “New Project…” and select “Tab Bar Application”
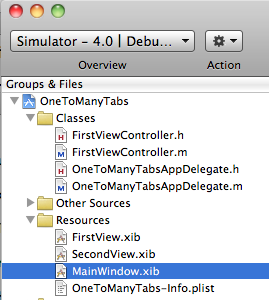
You will get a template UITabBar application that comes pre-loaded with two tabs. Both of these tabs have UIViews associated with them but we do not want to use them for our project. Click on the MainWindow.xib file under the resources folder to open up the main app window in Interface Builder.
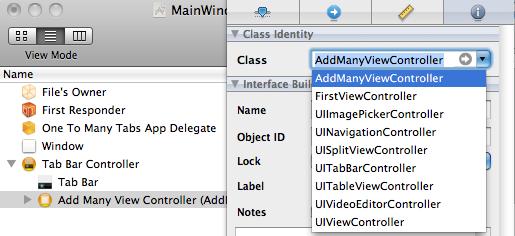
In Interface Builder you will see the MainWindow xib file that should look something like this:
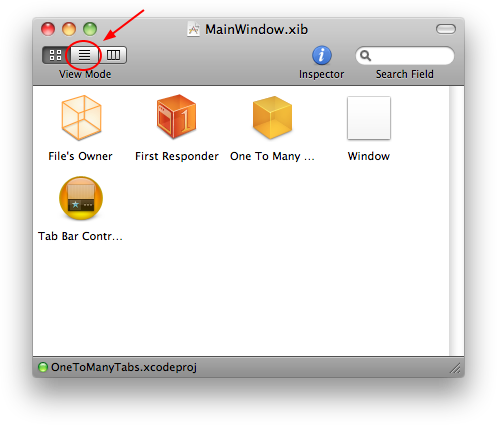
Use the button circled in the picture to change how the xib is displayed. This makes it easier to deal with the UITabBarController. Your xib file should now look like this:
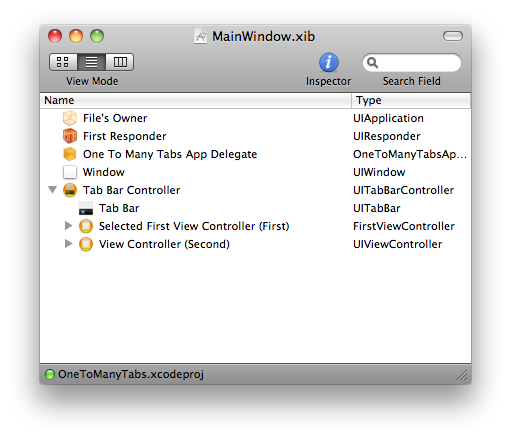
Highlight the two view controllers that XCode included here for us and delete them both. Now we are ready to rock.
Ok, so now let’s add a new UIViewController called AddManyViewController to the XCode Project. This UIViewController should have a UIButton on it with its IBOutlet and IBAction already hooked up. Here is what I did:
Since we are going to want this screen to open up when the app starts lets make sure to put AddManyViewController into our tab bar. We can just use Interface Builder for this part. Go back to your MainWindow.xib file in Interface Builder, select your UITabBarController and then select the first tab on the attributes inspector.
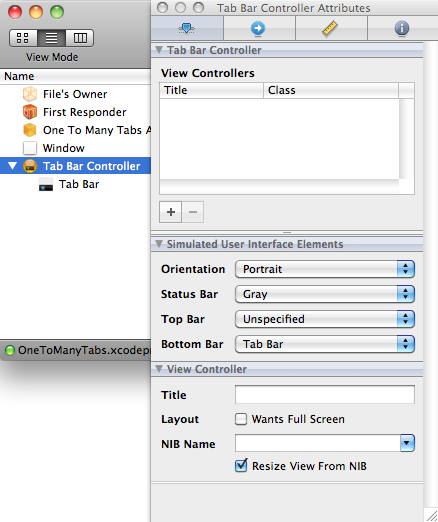
Click the plus sign in under the view controllers section to the AddManyViewController view controller to the tab bar. You will still need to configure this view controller more by specifying the nib (xib) file and the class that is acting as a controller. Select the node that appears under the tab bar to do this:
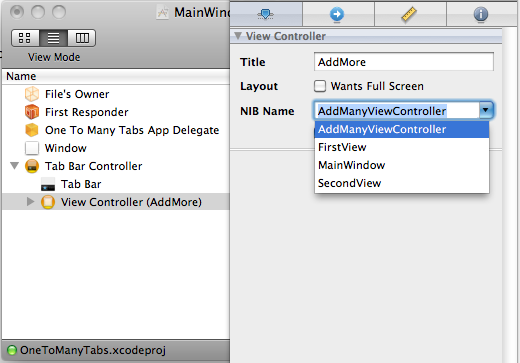
Change the nib name to AddManyViewController. Now select the last tab on the attributes inspector to specify the controller class.
Ok, save your Interface Builder file and build and run your XCode project. You should see this pop up in the simulator:
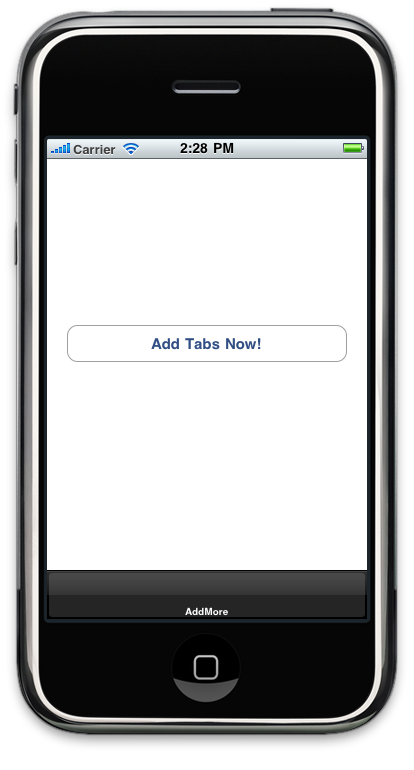
You should be able to click the button but nothing will happen yet.
Now we are ready to go over to the meat of this article. When we press the button we want to dynamically add a bunch of tabs to the iPhone. These will be added in code and they will come into the space with a smooth animation.
Head back over to the IBAction that we started coding earlier on. This will be located in the AddManyViewController.m file. We will be starting out with this code:
This array will hold the view controllers that will go into the UITabBar. While we are here we may as well declare an object variable for our view controllers (I just called it vc below).
Now what we need to do is to create a few UIViewControllers and add them to the array. I am just using generic view controllers here but you could just as easily use your own subclassed UIViewController for this.
Here is the fun part – since we have this array all we need to do is to send a message with the array as a parameter to the UITabBar to add these view controllers to the app. They will be animated as well which adds a nice touch.
What we are going to do is send the setViewControllers:animated message along with our array to the tab bar. Luckily, it is easy for us to get access to the tab bar from any view controller since a reference to the tab bar is included as a UIViewController property.
At this point you should be able to build and run your app and test your work. What you should expect to see is something like this:
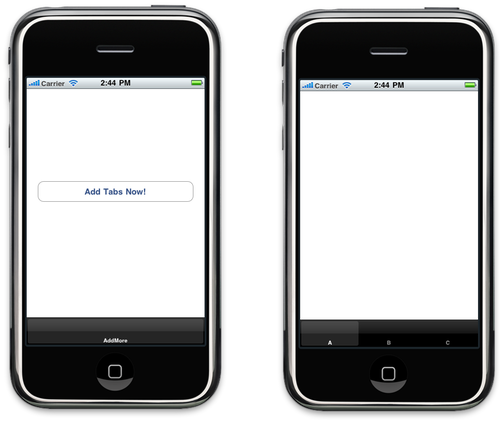
Take note of the tabs at the bottom of the screen. Our one AddMore tab has been completely replaced with the A, B and C tabs (and view controllers). Pretty Nifty!
Let us know in the comments below!!!
This is a great method for adding a Home Page type of Screen prior to launching the Tab Bar Application. My only question is how could you add an image to each of the Tabs since this is being done behind the scenes. I tried looking for what setting it would be but couldn’t find one. Thanks.
Actually never mind, I think I found it. Just need to add vc.tabBarItem.image = [UIImage imageNamed: @"tab1.png"]; and so on for each Tab and it should display the image. Will try that when I get home and see if it works. Thanks for the great tutorial.
You must be logged in to post a comment.

Learn How To Make An iPhone App right now using my proven system.
PS: Tons of us are having a blast living off our own code, join us now. Click here to get all the details.