How to Create Custom Buttons in Interface Builder
Today I’m going to show you how to create custom buttons for your iPhone app.
Here are the graphics that I used:
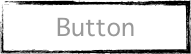


Create your buttons using your favorite image editor. Better yet, get your buttons designed by a graphic designer. Make sure to have three variations to accommodate each UIButton state.
Add your graphics to XCode. I simply drag them into XCode from my desktop. Be sure to keep the “copy into destination folder…” box checked.
Open the XIB view. Double click on the view (it will be a xib file) to open it up.
Add UIButton. Drag an UIButton from the library onto your view.
Change the button’s type to custom. Select the UIButton and then use the attributes applet to change the button type to “custom”.
Add images to button. Use the drop down box a near the top of the applet to change the attributes for each button state. Assign a different image to correspond to each state.
Build and Go. Build the app and test it to see if it worked. You may need to set the UIButton to disabled to see the third graphic appear.
Unlike many things with iPhone development, customizing the UI proves to be very easy and powerful. After learning the basics of iPhone development, this is one of the most important things you can do to create a unique app that people will be drawn to.
How to Create Custom Buttons in Interface Builder…
You’ve been kicked (a good thing) – Trackback from iPhoneKicks.com – iPhone SDK links, community driven…

Learn How To Make An iPhone App right now using my proven system.
PS: Tons of us are having a blast living off our own code, join us now. Click here to get all the details.